DIY Lettered Pumpkin Tutorial

Happy October, you guys! For the last couple of days I’ve been seeing the quote from Anne of Green Gables- “I’m so glad I live in a world where there are Octobers”- just about EVERYWHERE, and it’s killing me, because right now, in Ohio, it feels more like early July than early October. Where is my fall weather?! I want cool air and sweaters and scarves and soup and coffee all day and pretty leaves, and pumpkins & apples, but all I’m getting is humidity, rain, and 80 degree days. I don’t think Mother Nature got the memo.

Despite the weather, I’m over here getting into all the fall activities, which includes, of course, decoratiing. I really love the hand-lettered pumpkins I’ve been seeing all over, so I decided to make some of my own, and I thought I’d share the process with you, in case you want one - or a few- too. Because, actually, they’re pretty simple to make, and they’re really cute. So let’s jump right it!

To make these pumpkins you need 3 (maybe 4) things:

  • A pumpkin (real or faux- you choose)

  • A pencil

  • A paint pen (I used an oil-based Sharpie paint pen)

  • Optional carbon paper (or chalk- I’ll explain)

First, decide on your word/phrase and sketch it onto your pumpkin in pencil. Be sure to space your letters a little further apart than you normally would- and if you’re writing in cursive, leave extra space in your loops- because we’re going to create some faux calligraphy. If you’re unsure about lettering by hand, find a font you like on your computer and print your word/phrase. Then you can either use carbon paper OR cover the back of the printed page with chalk. Lay it against your pumpkin and use the pencil to trace around the outer edge of your printed word/phrase.

Next, use your paint pen to trace over your sketched lines. Be sure to shake your paint pen well before using and apply steady pressure while writing with it.

Finally, thicken some of your lines by tracing over them a couple more times with the pain pen. If you’ve traced a printed font, just fill in the wider spaces. If you did it free-hand, choose which lines you want to thicken. For faux-calligraphy, i.e. any script lettering, you’re going to make your down-strokes thicker. If you did a hand-printed font, you can get different looks by thinckening different lines. I chose to widen the left-hand side of every letter (also the down-strokes in this case) for my printed “HELLO”.

Let it dry for a few minutes and you’re done! Go find a cute place for it in your fall decor!

Easy "Stained Glass" Sun Catchers

When I was in high school, we had a service requirement to graduate. In my senior year, my best friend and I were volunteering together in a local nursing home, mainly on a floor with Alzheimer's and dementia patients. Up until that point, my interaction with people who needed constant care in that capacity was fairly limited- when I was VERY young we used to visit a second cousin who had cerebral palsy and some other conditions, and I had a great grandmother who suffered from Alzheimers- and I have to admit that it took me very far out of my comfort zone. I think I just had a hard time knowing how to act with the residents- these people so much older than me, but many of them needing to be cared for like children- so I struggled with it so much.

Which is why I think it's great that the fifth grade class at my kids' school spends some time during the school year visiting with the residents at a nursing home/assisted living facility nearby. The kids go 3-4 times over the course of the year to spend time with the residents, and it's really interesting to see the change in their approach to things as the year goes on. Usually on their first visit, most of the students are pretty quiet and unsure of where to go, but by the time they have their last vsit, they've gotten comfortable, both in the facility itself, and with the residents.

Usually, the class brings along some sort of craft or activity to do (so everyone's not just sitting around staring at each other) and they might have a snack or treat, play games, and sing together. And since I am the classroom parent for my daughter's class, her teacher asked me to help with crafts for the kids to do with the residents. This turned out to be harder than it sounds, because they had to be something that didn't take too long, was easy to transport to the facility, could be done by two or 3 people at the same time, and had to be fairly easy in terms of motor skills so that the residents could participate. Oh, and we wanted it to be something fun to display, because the residents would keep them.

My most favorite one was the one we did on their last visit, this spring. These sun catchers were easy for the kids and residents to do together (in most cases the kids handled the glue while the residents chose the color and placement of the tissue paper), and they look so bright and cheery hanging in the windows. The 5th graders really enjoyed makng them, and my 4 & 5 year-old testers had no problem doing them all by themselves, so they are gorgeous and great for any age! And you may already have most of the items at home, but if you don't, you can find all of them at the dollar store.

To make these stained glass suncatchers, you'll need:

Sun Catcher Supplies
  • Tissue paper in various colors (I just bought a package of 24 sheets in multiple colors)
  • Clear plastic plates
  • School glue
  • a small bowl
  • Foam brush of large-ish paint brush
  • Twine, yarn or ribbon
  • Hot glue gun

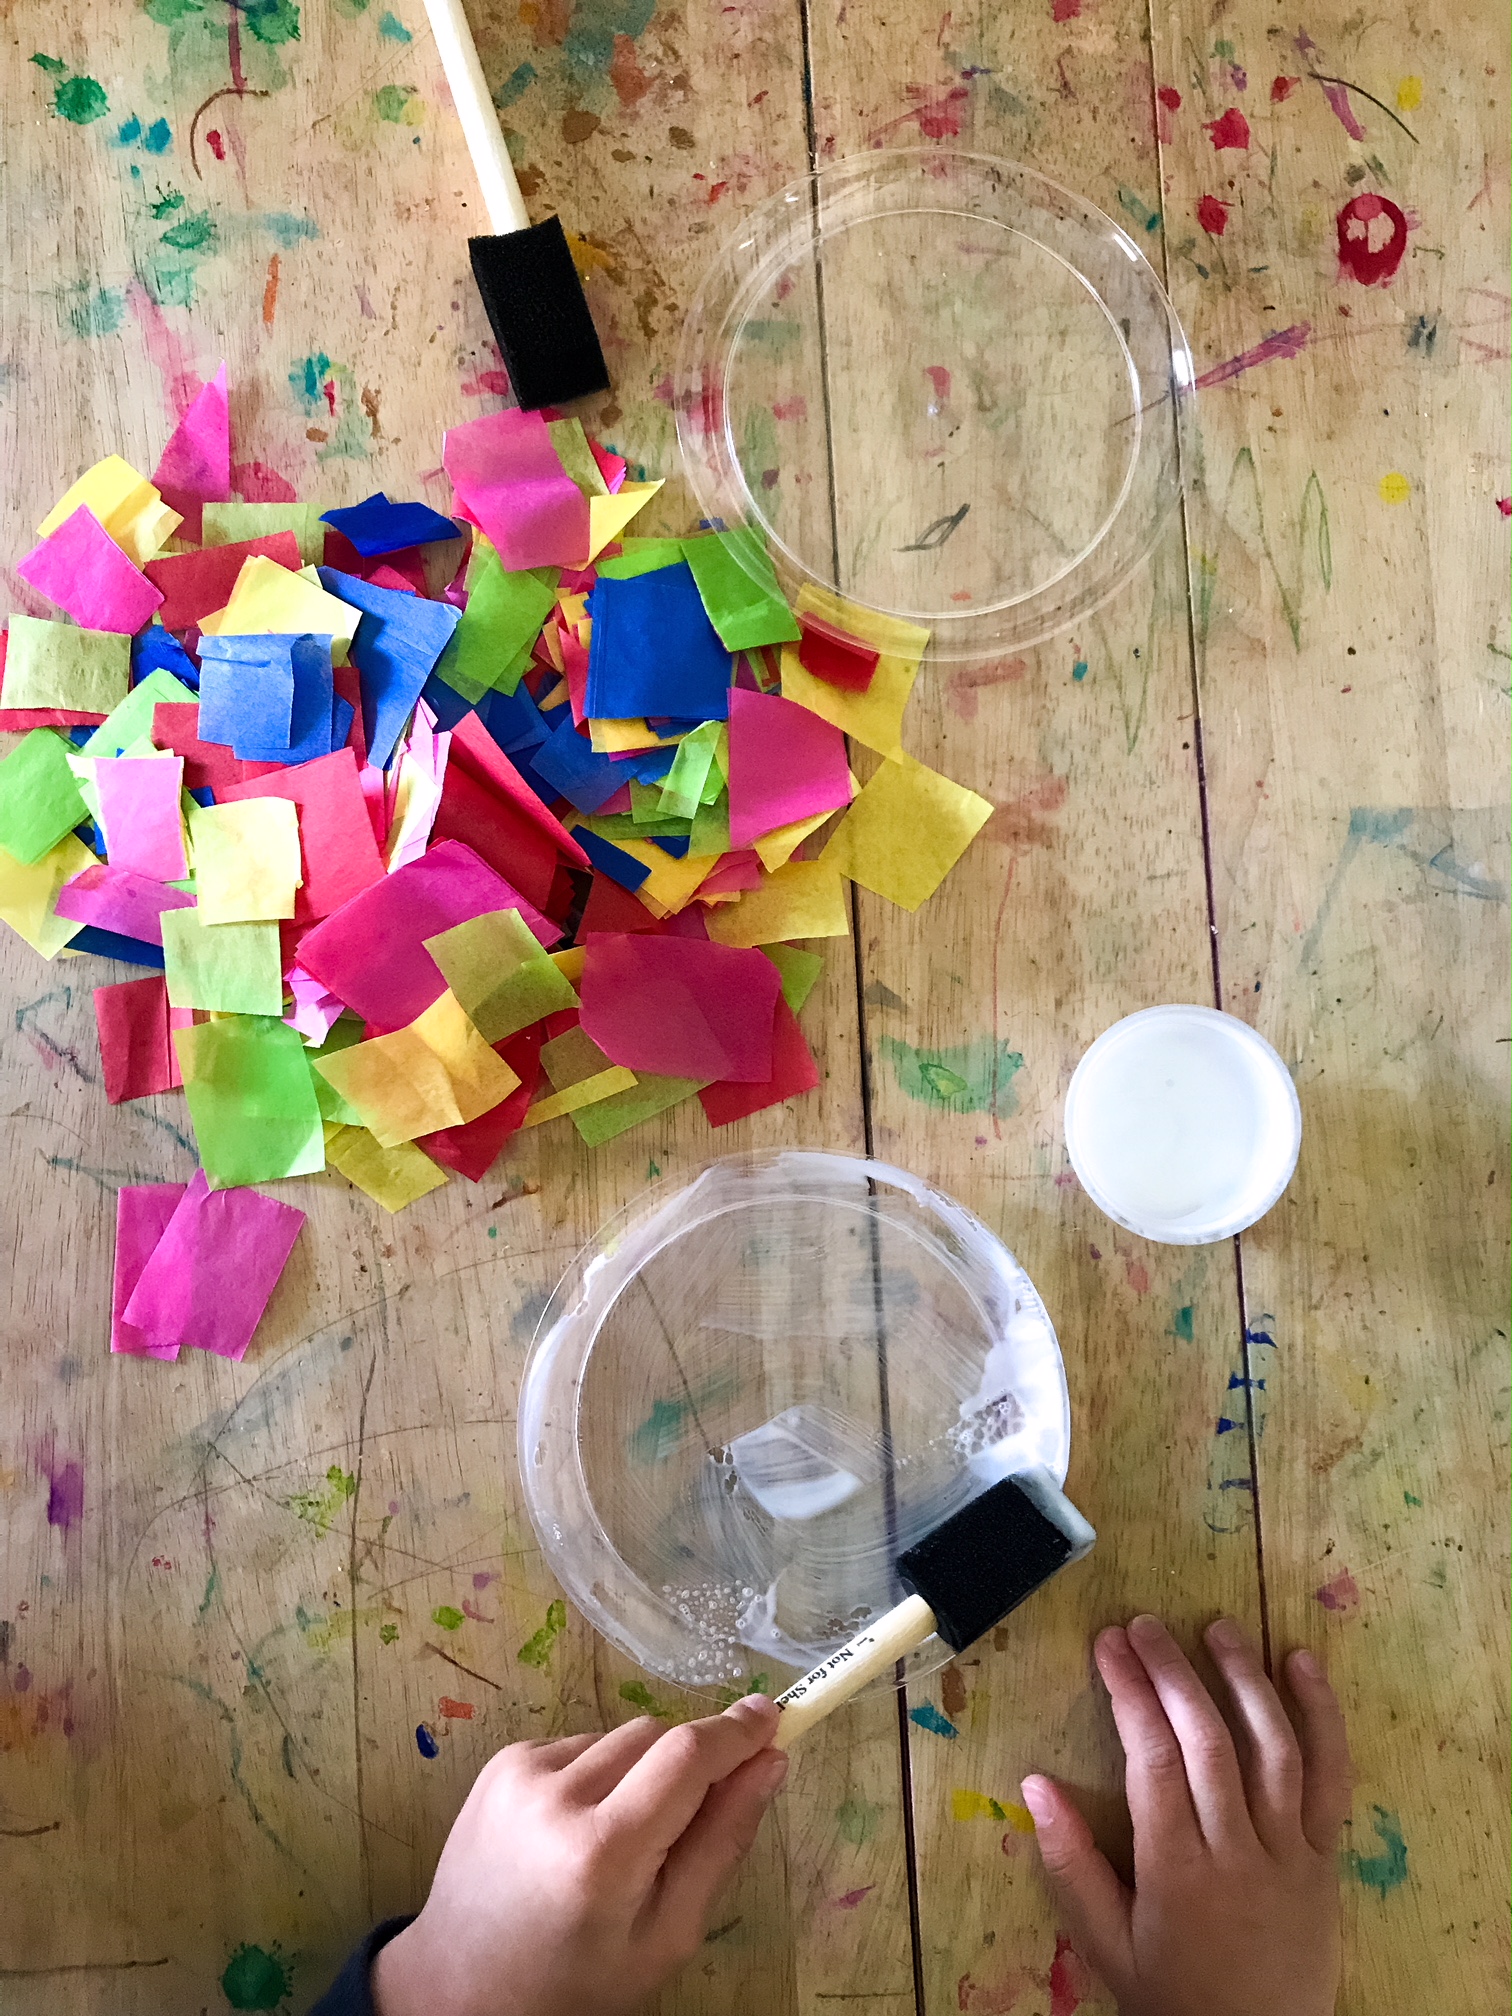
Pour some glue into your bowl. Working in sections, use the foam brush to paint glue on the top side of the plate.

Easy Stained Glass Sun Catchers

Lay pieces of tissue in a single layer on top of the glue. The pieces of tissue paper can overlap at the edges, but you want to avoid laying too many pieces on top of each other, so the sun can still filter through. 

Easy Stained Glass Sun Catchers

Gently paint a second layer of glue over the tissue paper, smoothing out any bumps or pieces hanging over the edge. Allow to dry. When the glue is dry, hot glue a loop of yarn, twine or ribbon to the back of the plate. Hang in a window that gets lots of sun.

Easy Stained Glass Sun Catchers

When I prepped everything to take to the nursing home, I pre-cut the tissue paper into squares and hot-glued loops of twine to the backs of the plates ahead of time, but you can let the kids do the cutting (or tear the tissue paper), and add your hanger whenever works for you.

Build-Your-Own Unicorn Habitats

This post contains affiliate links. If you choose to make a purchase via one of my links, I may receive a small commission at no additional cost to you.

IMG_7071.JPG

Do you believe in unicorns?! My kids love ALL magical creatures, but unicorns are a favorite around here. So, when I saw THIS Etsy listing, I knew we had to try making them.

The first time I made them at home with my kids & nieces, I bought some craft boxes to put them in and, even though they turned out really cute and the kids had a lot of fun with them, I felt like the boxes were too deep and didn't give us enough surface area to work on. We had to put styrofoam and craft paper in the bottoms of the boxes to bring everything up to the top. So, when I decided to try them during a birthday party in the art studio, I remembered THIS post from Meri Cherry and I decided to use 6" terra cotta saucers instead, and they worked really well!

IMG_3549.jpg

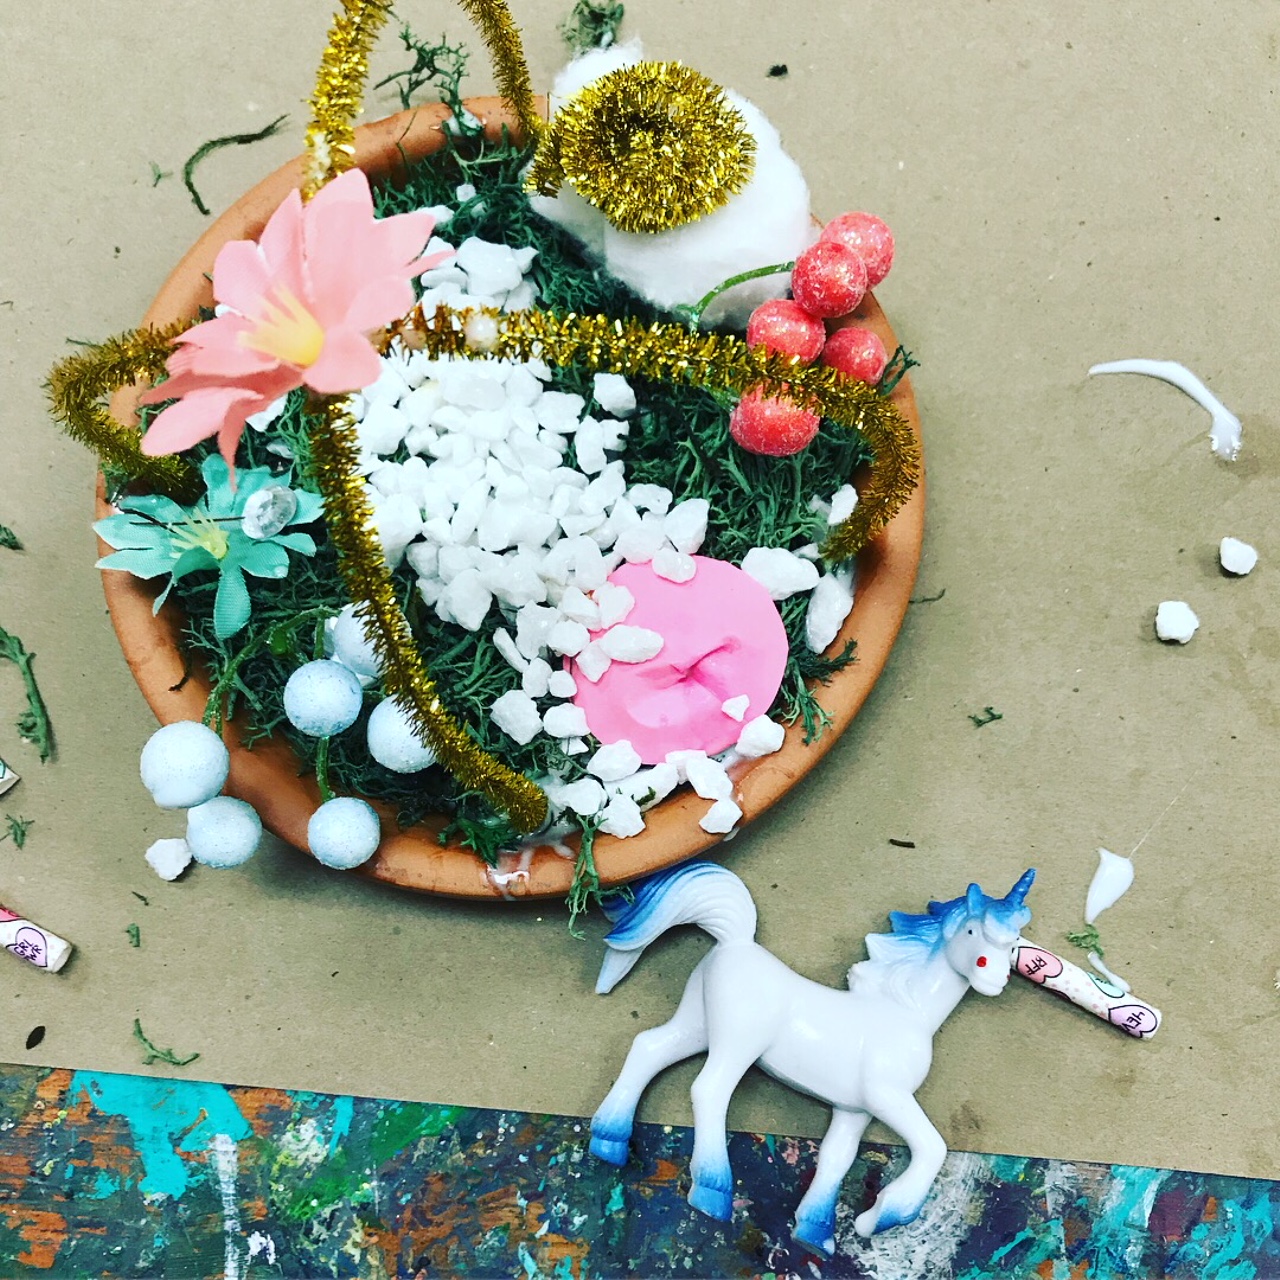
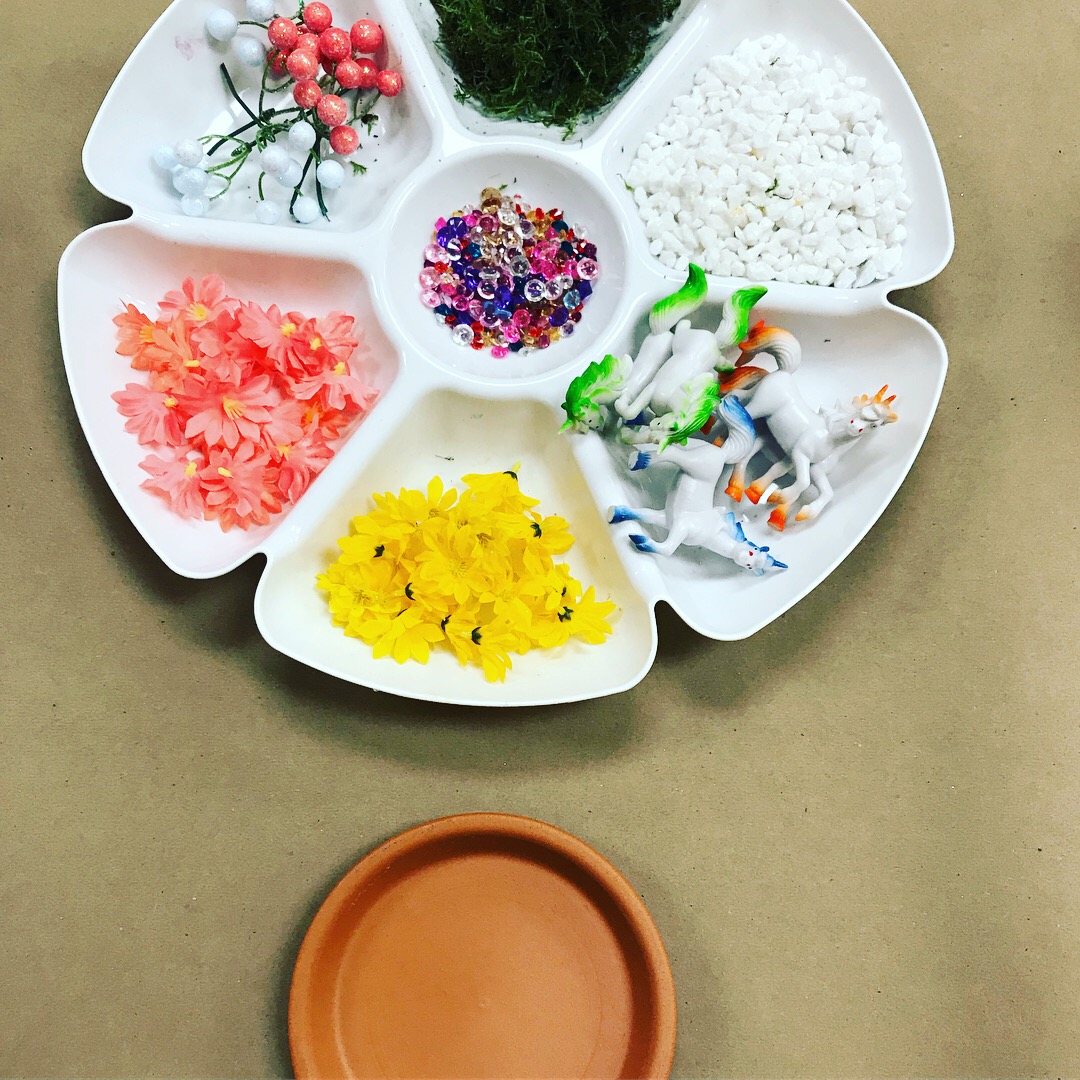
To make these habitats, I gave the kids a variety of items- things I had on hand or at the studio, plus additional things I purchased, like the gemstones. The only direction I gave was for them to glue down some moss first to act as the ground, and I just let them have at it from there. When they were done, everyone got to pick a unicorn to put in their habitat.

IMG_3542.JPG
IMG_7070.JPG
IMG_7069.JPG

Except Theo. He's not all that into unicorns, so he made a dinosaur habitat instead.

IMG_3524.jpg

WHAT WE USED

  • Craft boxes (from the dollar store) or terra cotta saucers (from Walmart)
  • Unicorns
  • preserved moss that I had on hand- similar here (you'll get 3-4 habitats out of 1 bag)
  • Large acrylic gems
  • Small pink acrylic beads
  • Small rocks
  • White aquarium gravel
  • Glitter that I had on hand
  • Paper straws
  • Silk flowers
  • Faux berries
  • Chenille stems
  • Cotton balls
  • Pinecones
  • Dinos
IMG_7068.JPG
IMG_3494.jpg
IMG_7074.JPG

The best part about making these habitats was letting the kids have free reign with everything they had available to them. It's always really interesting to watch them explore the materials and try new things and see what they can create!

Valentine's Day Mini Pull-String Piñata

Hi, Everybody! Thanks for stopping by today! I'm putting together a fun little surprise for my kids for Valentine's Day this year and I thought I'd share a little bit about it with you!

I love to give my kids fun and thoughtful little gifts, and I'm all about the packaging, so this year I'm making these small pull-string piñatas for them. My kids span a pretty wide age-range (4-15 1/2), so the plan for these is to fill them with some fun small gifts and let them break them open on Valentine's Day, but I also think that these would make a really great box for a kiddo to collect valentines in at school. How cool would it be to let your friends and classmates fill up your piñata, and then break it open when you get home?! So, if you have a school-ager, consider helping him or her make one to take to school if they celebrate Valentine's Day! Or, you could make an even smaller version and fill it with candy, or stickers, or even confetti... lots of possibilities here ;)

Ok, on to the tutorial. First- a disclaimer. This is going to look like a REALLLLY long job, but it actually comes together fairly quickly. I took lots of pictures and am trying to be very clear in my directions so that I don't confuse anyone! Here we go!

Tools and Materials:

8 ½ x 11 sheet of paper
Cardboard
Masking Tape
Heavy brown craft paper OR very thin cardboard (like a cereal box)
Tissue Paper
Regular old school glue
Embroidery/large needle
Twine/yarn/string of some sort
Scissors
Craft knife
Pencil
 

What To Do:

Create a heart template: fold your piece of paper in half so that it is now 8 ½ x 5 ½. Trace one half of a heart on the fold and cut out. Unfold your heart and lay in on your cardboard; trace 2 and cut using your craft knife (it's a good idea to put a spare piece of cardboard underneath where you are cutting to protect your work surface).
 

IMG_6135.jpg
IMG_6138.jpg

Set hearts aside. Cut 2- 4 ½ inch wide strips from your cardboard (if you are making a smaller piñata, I would use narrower strips). I cut mine from a tri-fold board I purchased at the dollar store, so they were approximately 24 inches long, but the length you need will depend on how large your heart is. I purposely cut mine long so that I could trim them down where needed. 

IMG_6142.jpg

Gently bend your cardboard strips to help make them more flexible.

Sorry about the glare! It was hard to get a good picture of this on my table!

Sorry about the glare! It was hard to get a good picture of this on my table!

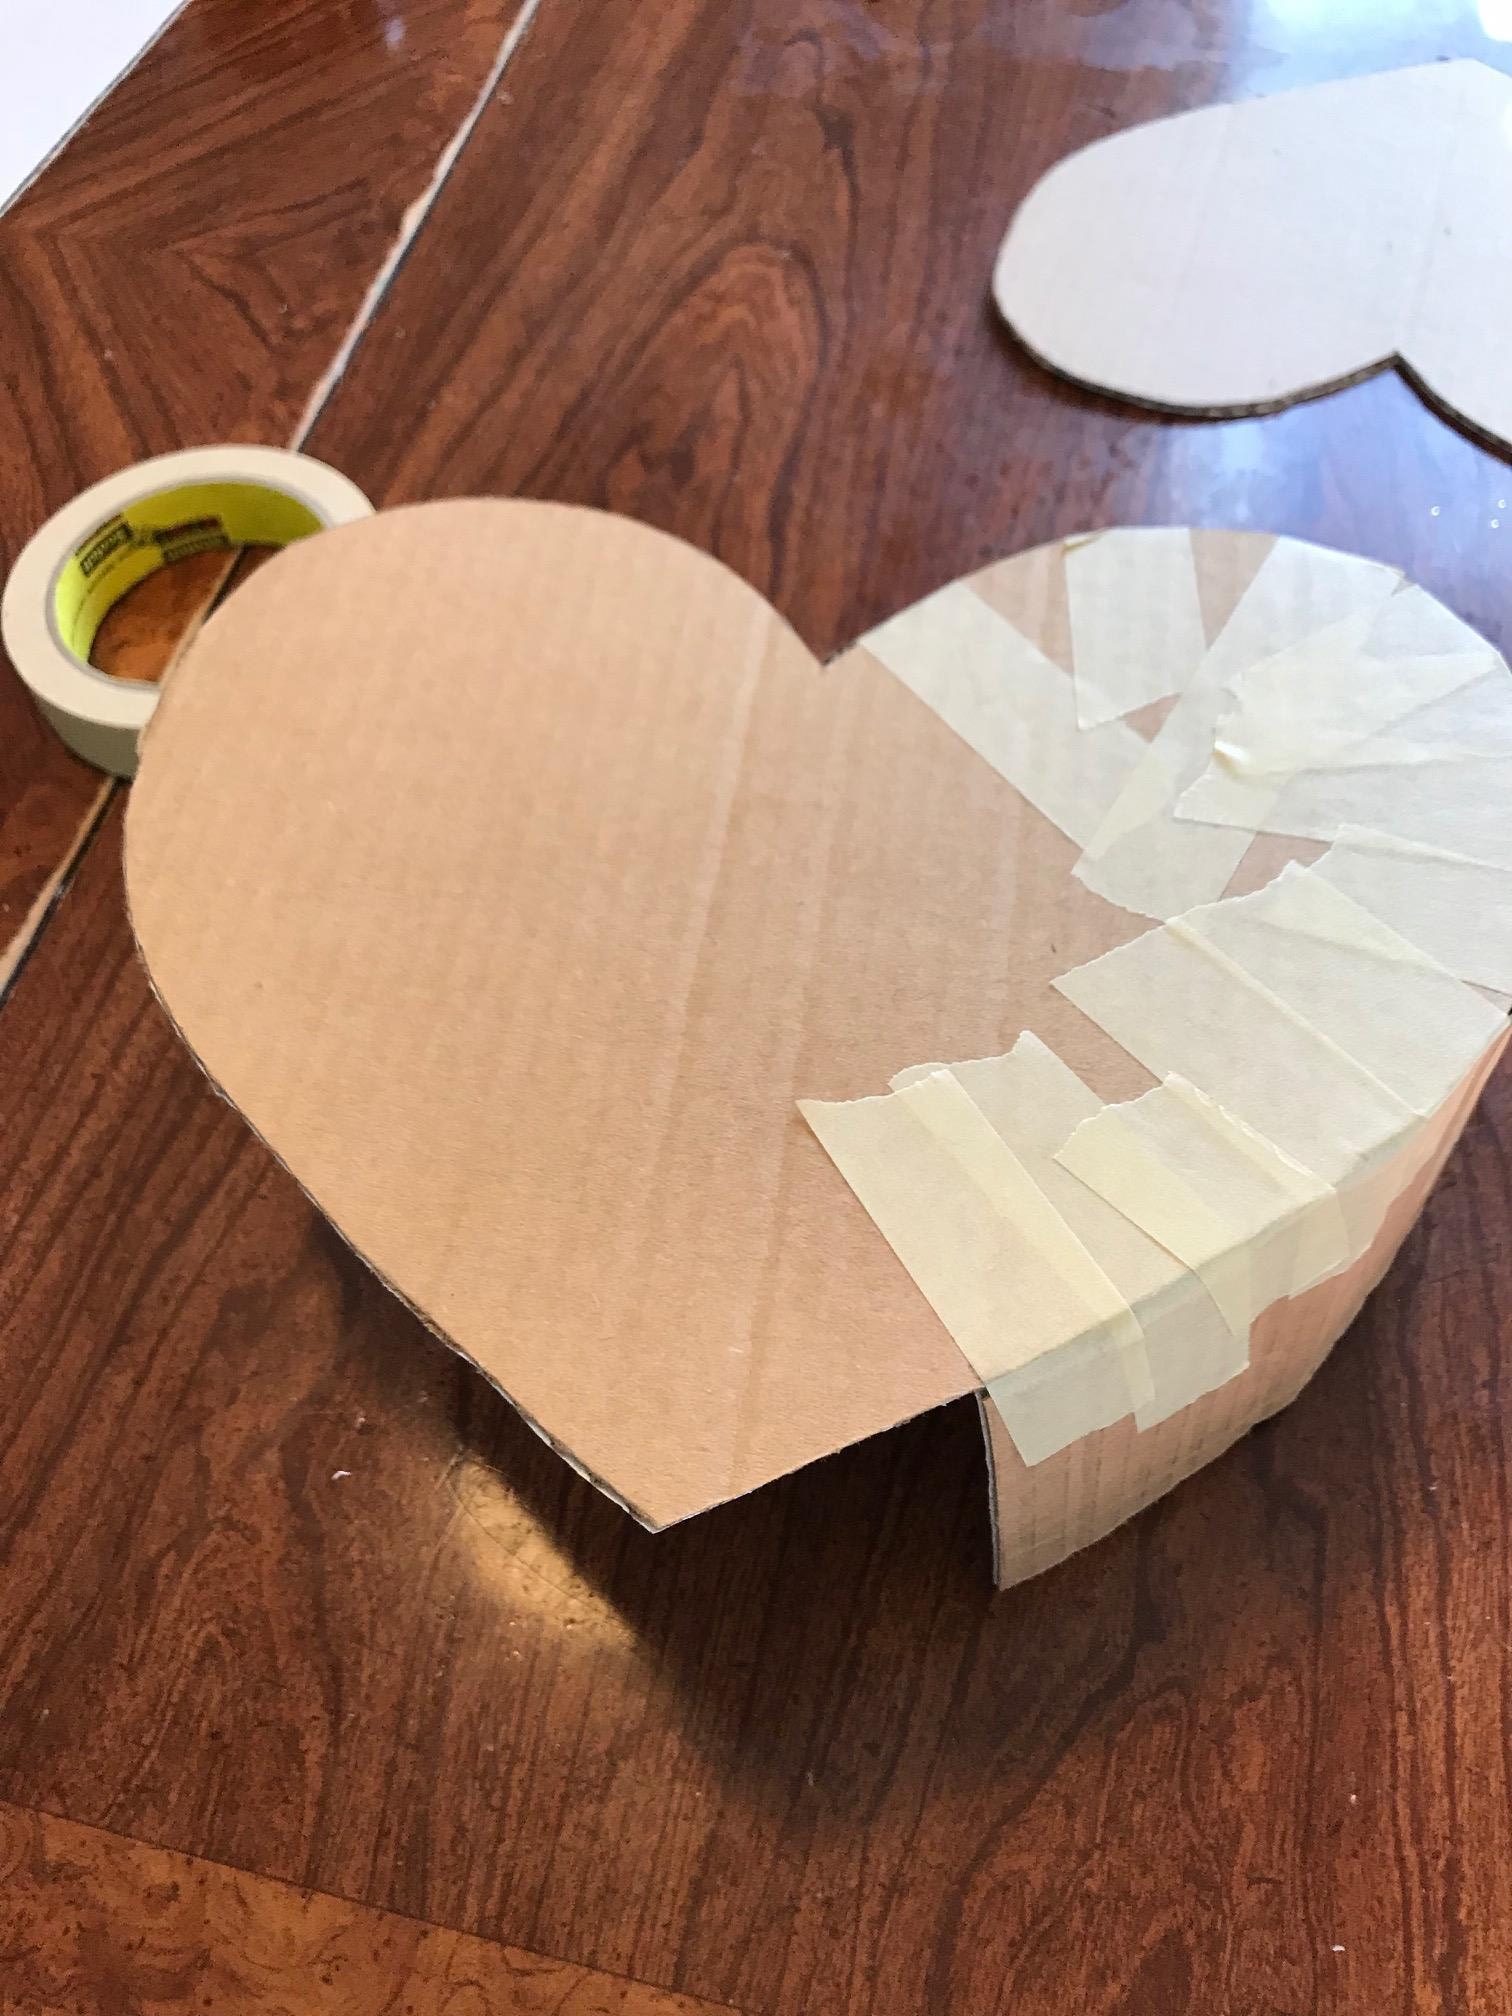
Beginning at the top center of, attach one of your hearts to the top edge of one cardboard strip. Use lots of tape! Stop taping about 2 inches from the bottom point of your heart (1 inch for smaller piñatas). Trim off your cardboard strip so that you will have an opening at the bottom of the piñata.
 

IMG_6146.jpg

Reinforce the outside of the seam with masking tape. Tape the seam on the inside of your piñata if you wish.

IMG_6152.jpg

On the other side of your heart, measure up 2 inches from the center point (1 inch for smaller piñatas) and mark. Line up one edge of your second cardboard strip with this mark and tape it to the heart the same way you did on the first side. STOP taping about 2 ¼ inches away from the top center point. Trim off your cardboard strip where it meets the center point on the top of your heart (this will be your flap to open for filling the piñata). Tape inside if you wish. Reinforce the outer seam with masking tape as before.

IMG_6156.jpg

Flip the piñata over so the front heart is on your work surface with sides sticking up. Lay your second heart on top, lining up edges and points. Tape in the same manner as first side. Don’t forget to reinforce those edges!

Cut a 6 x 5 ½ piece of your heavy craft paper (or cereal box). Mark a line 1 inch in from each long edge. Fold in half length-wise with lines on the inside. Make a good crease- this will become the bottom point of your heart. Open the paper up and fold the long edges in to meet the lines you drew.

IMG_6167.jpg
IMG_6172.jpg

Thread your needle with a length of twine. Push the needle up through the bottom of the craft paper at the crease. Pull the end of the end of the twine out of the needle’s eye and knot well (I tied mine about 5 times in the same place). You should now have the knot between the folds of the paper, with the string hanging from the point of your heart.

IMG_6173.jpg
IMG_6175.jpg

Fold the paper back in half and insert it into the bottom of your piñata, lining the crease up with the bottom point and the fold of the long edges up with the sides of the piñata. Tape into place on the outside. 

IMG_6177.jpg

Time to cover your piñata (I promise, we’re almost done)! Cut a bunch of 2 inch wide (1- 1 ½ for smaller piñatas) strips of tissue paper. Stack your strips on top of each other and cut fringe along the bottom edge.

IMG_6179.jpg

Now, here’s where I’m going to tell you to do look at the pictures for reference, but also ignore them. I made the mistake of starting on the outer edge of my heart and then covering the front and back. It worked, but would have been a lot less difficult if I had started with the front & back and then done the edge. So. Do as I say. Not as I… did.

Starting at the bottom point of the piñata, you are going to layer your fringe strips on top of each other, making sure to over lap so no cardboard is showing. I glued the top edge of each strip about 1/8th to 1/4 of an inch above the top edge of the previous strip. I also found it helpful to glue the first few layers so that they followed the shape of the bottom point. Then, just lay the strips straight across, trimming off any excess length. When you get to the top, be sure to tuck the strips in around the center of your heart so you maintain the shape!

IMG_6188.jpg

When your front and back are covered, then cover the sides, starting at the bottom on either side of your point and working your way up to the center. If you need to, once your whole piñata is covered, give your fringe a little haircut to make it nice and even & emphasize the shape!

Bottom is to the right in this photo- see the pull string?

Bottom is to the right in this photo- see the pull string?

IMG_6187.jpg

LAST STEP! Cut 2 pieces of twine that are equal in length. Thread one into the needle and push it down through one of the top curves of your heart. Knot well inside the piñata. Thread your needle with the other piece of twine and do the same thing on the other side of your heart. Try to make sure that both pieces are placed in approximately the same spot and centered in the top of the curve. Finally, pull up your ends so that the piñata hangs evenly and knot the twine pieces together. Trim off excess and VOILA! You are done!! Hang your piñata up somewhere so that the glue can dry, then decide how you want to haveve fun with it!

IMG_6200.jpg

Phew! Thanks for hanging in until the end! I hope you got an amazing little surprise for your kid(s) out of it...  I can't wait for mine to see their surprises!

Winter Boredom Buster: DIY Cardboard Tube Swords

Well, its that time of year again. Christmas and the New Year have come and gone, and we're digging for the cold winter months. Winter came into our area full-force over Christmas and I have a feeling we're going to be spending a lot of time cooped up inside over the next few months. Which means that I'm going to be looking for lots of ways to stave off boredom and keep my kids from fighting over EVERY. LITTLE. THING. Because, let's be honest, short days + cold weather + being stuck inside = cranky kids (and mom & dad, too). So, hopefully, over the next days/weeks/months, I'll be sharing with you easy crafts and activities to help keep the boredom at bay.

Today I'm going to share with you a quick tutorial on how to make these cardboard swords. I actually made these for an event I did at work in early December, and had extras that I passed on to my kids. They go together pretty quickly and my kids have played with them quite a bit over the last few weeks. If you're like me, you'll even have leftover cardboard boxes and wrapping paper tubes from Christmas, which makes these super easy to do!


IMG_5128.jpg

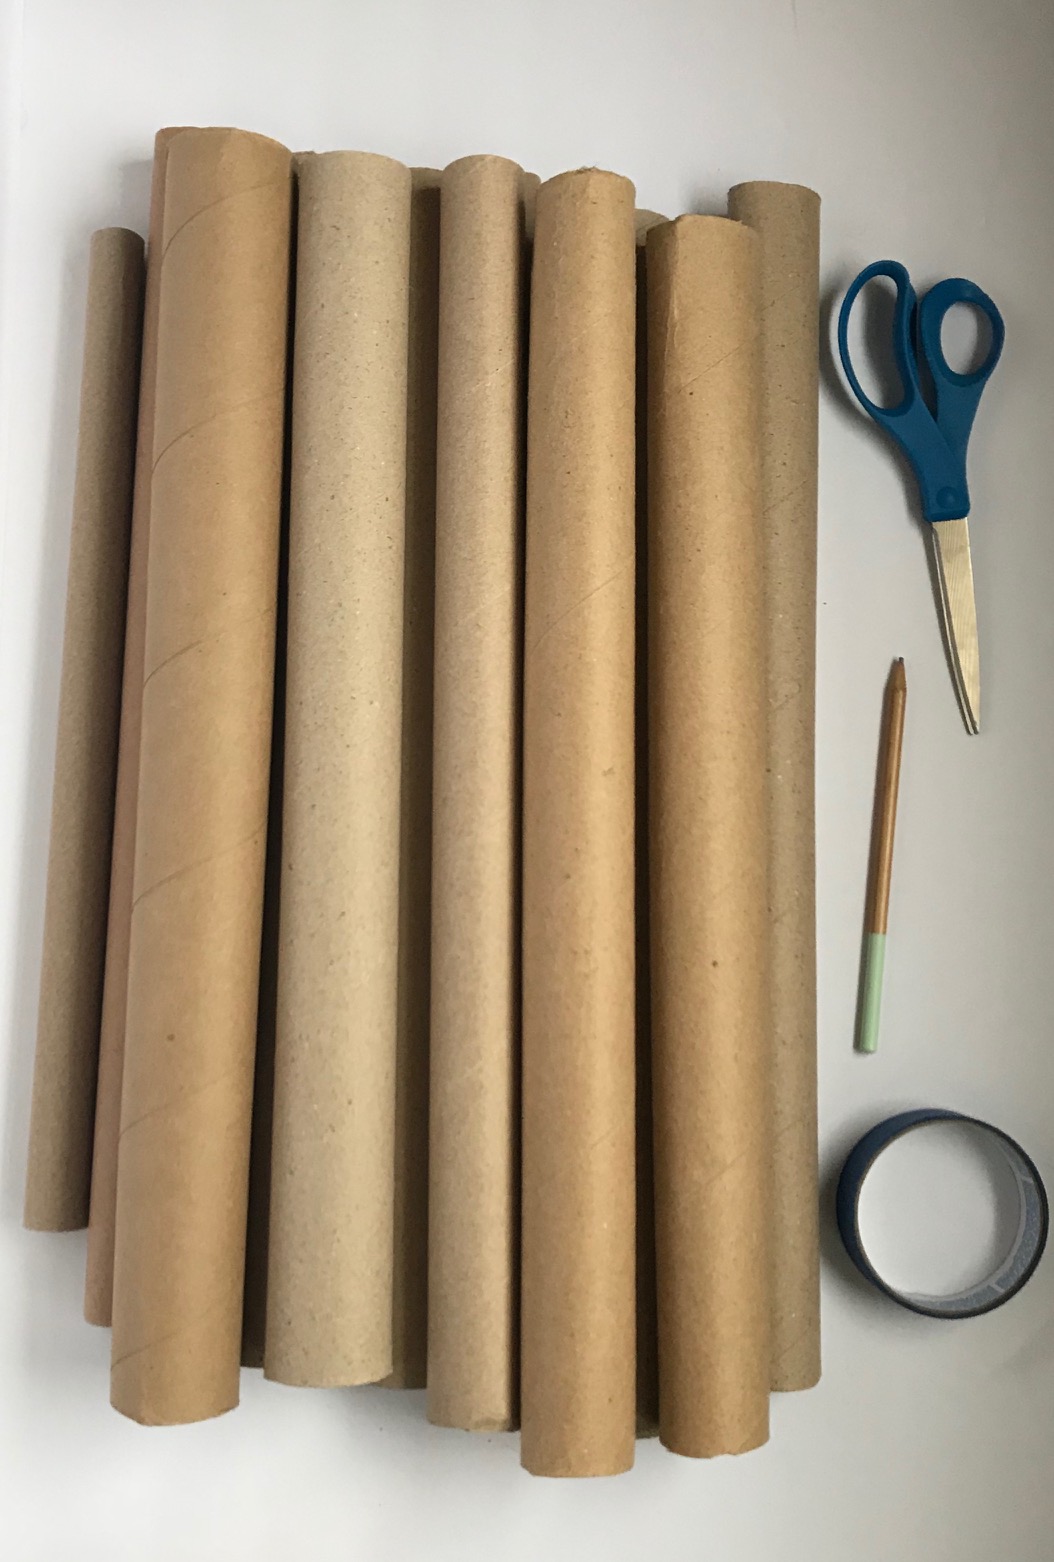
For the swords, you will need:

  • Cardboard tubes- when I made these for work, I raided my wrapping paper, unrolling the rolls that had only a little bit of paper left, and stealing the tubes inside. Now, I have some more tubes from Christmas wrapping, but if you didn't just happen to save them to add to your ever-growing stash of cardboard like me, fear not! You can make cardboard tubes by scoring a rectangle of thin-ish cardboard, rolling it up, and hot glueing the edge.
  • Pencil
  • Masking tape (I couldn't find my masking tape, so I used blue painter's tape, instead).

Not Pictured:

  • A piece of thin-ish flat cardboard- like the side of a box, or an empty cereal box.
  • Craft knife
  • Hot glue gun
  • Foil (optional)
  • Markers/gems/glue/paint/decorations (also optional)

It's going to look like there are a lot of steps to making these swords, but that's because I wanted to break them WAAAY down to make them really easy, so don't worry, and don't feel overwhelmed!

  1. If your cardboard tubes are long, trim off the end to your desired length. I probably made mine about 24 inches.
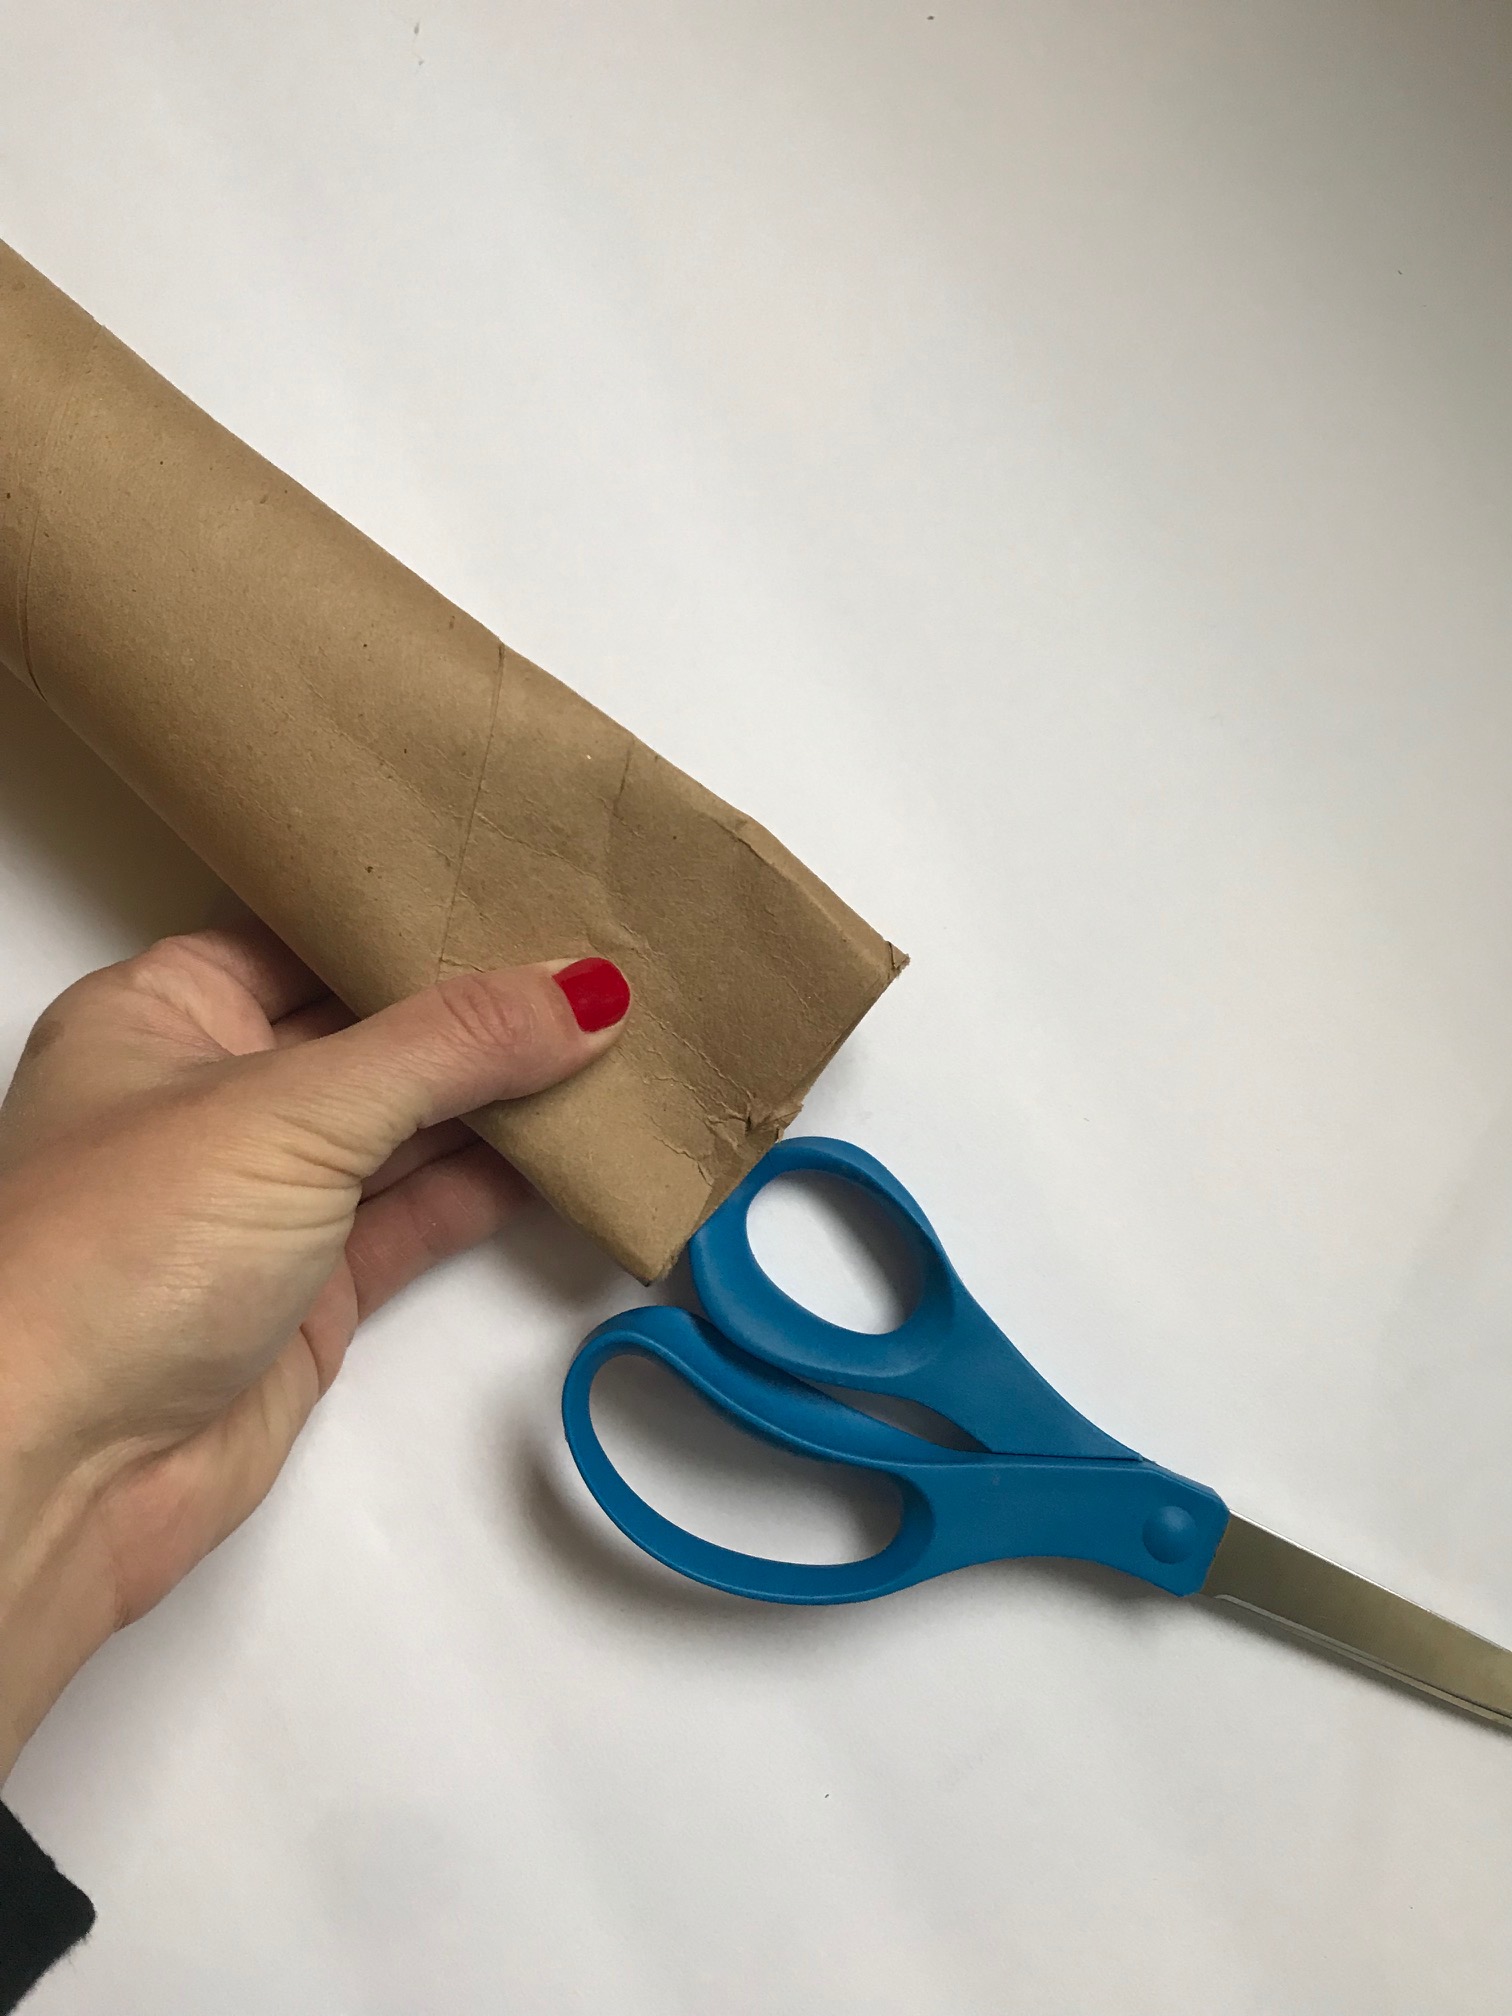
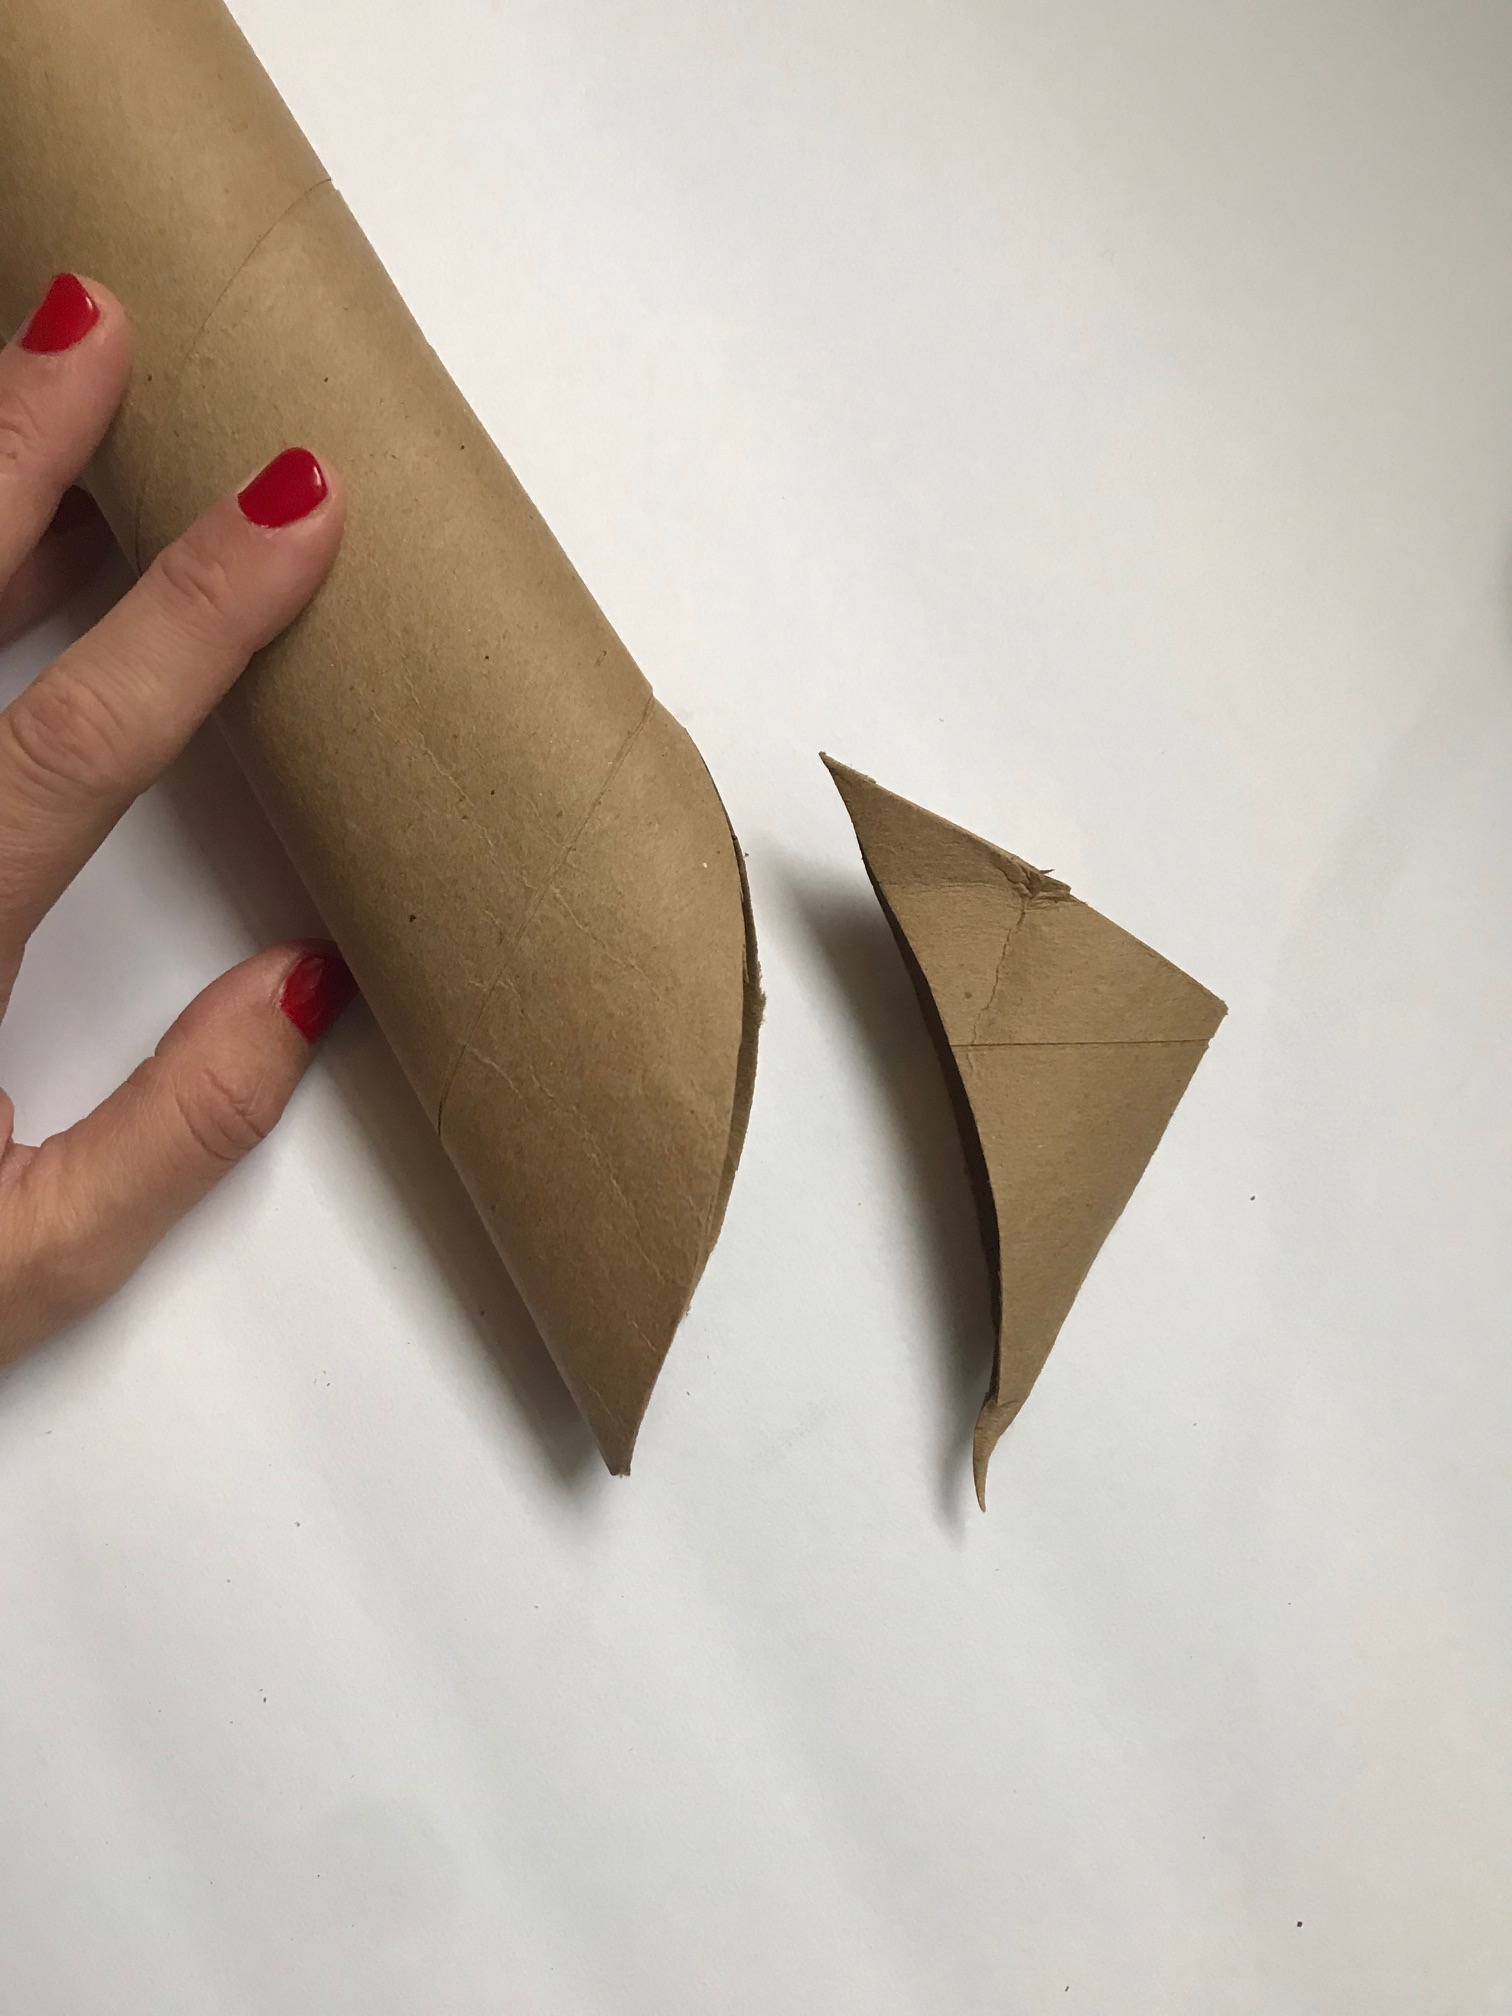
  2. Flatten one end slightly and cut a curved edge (be careful to round out the top point a little bit so that it isn't TOO sharp; some of mine were actually sharper than I wanted and I had to go back and round them off some more):
IMG_5129.jpg
IMG_5130.jpg


        3. Tape off this edge with masking tape:

IMG_5131.jpg

        4. If you would like to cover the blade with foil to make it look more like a sword, now is the               time. Simply wrap pieces of foil around it (if you want, you can hot glue them to give them             more staying power). I left my swords uncovered for two reasons: a) I was worried the foil            would give them too sharp of an edge and b) I was giving kids free reign to decorate them            as they chose.

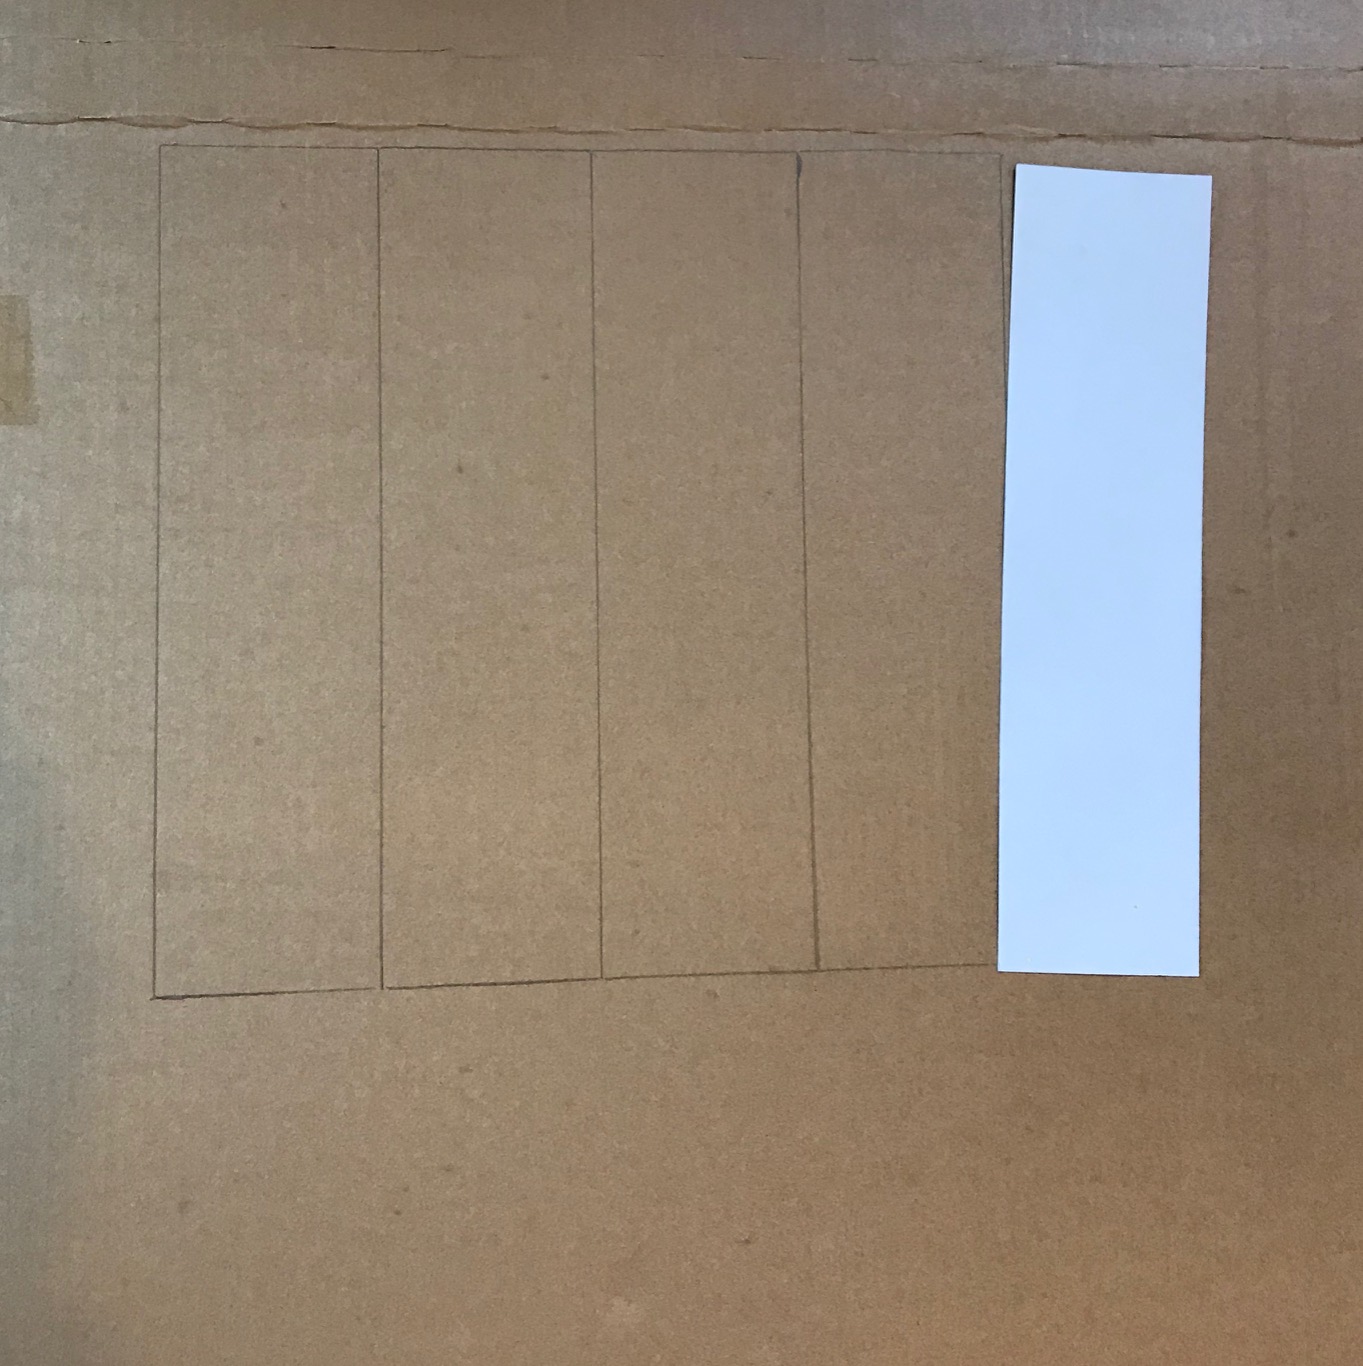
       5. On your flat piece of cardboard, draw one rectangle per sword. I made mine 3x12 inches,                but you can make any size you want as long as they are wider than the width of your                      sword blade. These will be the hand guards. Cut out using your craft knife:

IMG_5132.jpg

        6. On the left side of the hand guard, trace the bottom round edge of your blade and cut it                 out with your craft knife.

IMG_5136.jpg

       7. Slide hand guard up over the bottom of the blade. Make sure the hand guard is extending             out to the right, and that the curved edge of the blade is facing the same direction:

       8. Bend right side of hand guard down, forming a "D" shape, and hot glue to the bottom of                the blade. Hold for a few seconds to make sure the hot glue dries:

IMG_5141.jpg

       9. Let your kids decorate them with paint, markers, gems, etc. (this keeps them occupied                    longer!), and when they are dry, they are ready to sword fight!

Just a note about safety- before letting my kids play with these swords, we talked about making sure that they were hitting SWORDS ONLY, not people, so no one got hurt.

And that's it! My kids have spent several hours sword-fighting, playing pretend, and just generally enjoying their swords!